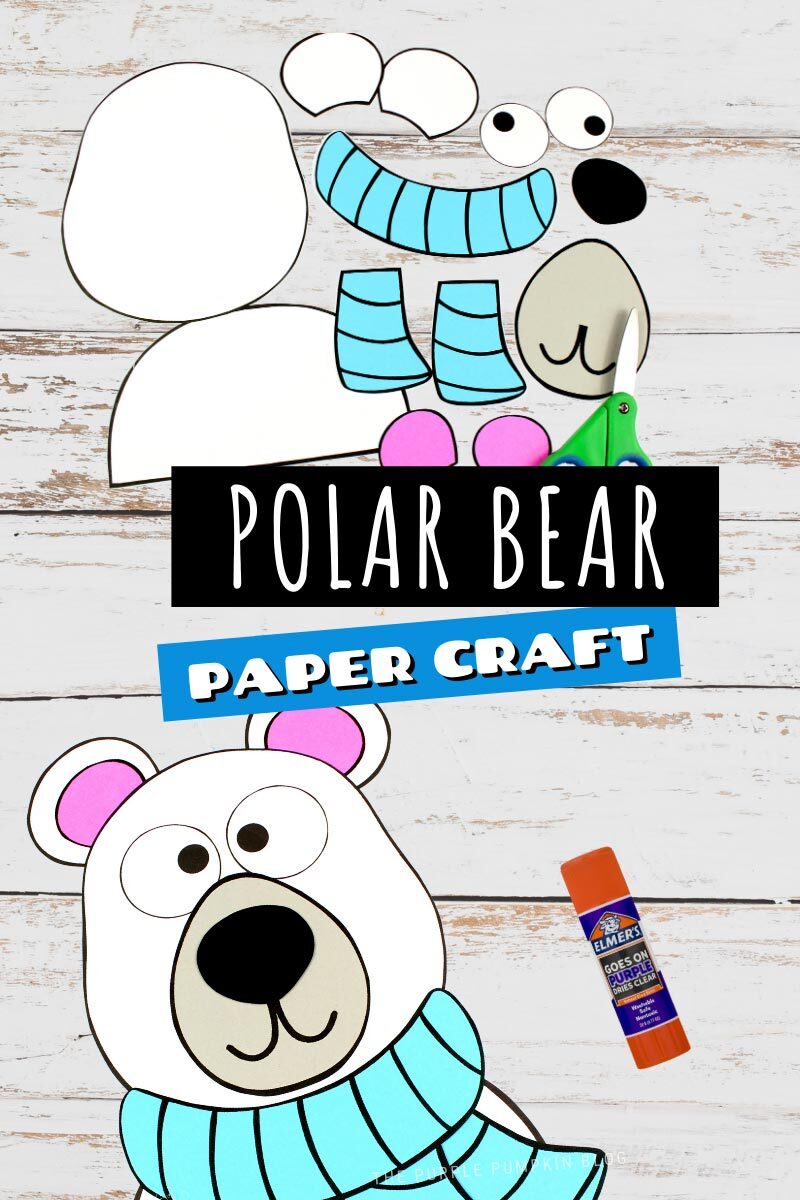
Printable Polar Bear Craft - Begin by gluing the nose and mouth to the middle of the paper plate, near the bottom. Use puffy paint to make your own polar bear soft. Learn how to make easy polar bear paper plate craft with free printable templates. Download the polar bear template and print it out. Simply cut out the different pieces and put them together to build a bear! The polar bear is the largest predator that lives on land. Pair it with our penguin template to create a few different arctic animals. If you’d like to add any color or details to the face of your polar bear, do that now. These paper polar bears are a fun winter craft idea and are part of a series of printable winter crafts i’ve been working on. Download and print the polar bear template below and cut out the polar bear face pieces.

Easy Polar Bear Arctic Animal Craft for Kids Simple Mom Project
Then, begin gluing them on all parts of the polar bear’s body. Web here’s a very easy printable polar bear craft for kids!. Take the.
Free Printable Polar Bear Craftivity & Creative Writing Project
Web another fun way to enjoy this arctic animal craft friend is to print the polar bear template on white paper and color him first..

Free Printable Polar Bear Paper Craft Cute Winter Craft For All Ages
Use the black & white printable as a coloring page. Download the polar bear template, print, and cut out the pieces you need. Download and.

Printable Polar Bear Craft
Cut out the handprint and set it aside. Begin by spreading glue over a whole section of polar bear background paper. Included is an instruction.

Easy Polar Bear Arctic Animal Craft for Kids Simple Mom Project
Next, simply glue all the pieces together. Then attach the head of your polar bear to the front of the paper bag, covering where you.

Free Printable Polar Bear Paper Craft Cute Winter Craft For All Ages
Included is an instruction guideline for the polar bear outline and individual pieces. This ocean craft is so easy and perfect for kids of any.
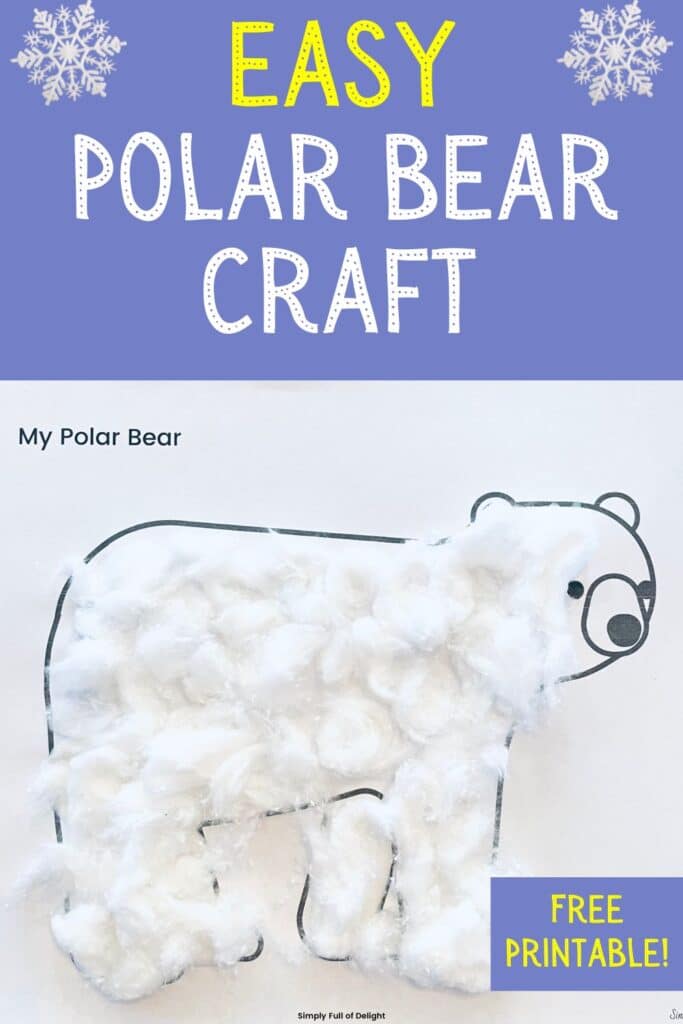
Free Polar Bear Printable (with Craft Ideas!) Simply Full of Delight
Begin by gluing the side pieces to all but one side of the tissue box. Add the legs and tail. Print out the file on.

Easy Polar Bear Arctic Animal Craft for Kids Simple Mom Project
Add glue to the entire surface of the paper plate. We have two different templates that you can. Web create a paper loop to make.

Free Printable Polar Bear Paper Craft Cute Winter Craft For All Ages
Begin by gluing the side pieces to all but one side of the tissue box. Download the polar bear template and print it out. Use.

Easy Polar Bear Arctic Animal Craft for Kids Simple Mom Project
Next, simply glue all the pieces together. Cut out the handprint and set it aside. Do not republish, upload, or alter the pdf files. Web.
Glue The Polar Bear’s Head Onto The Thumb.
If you’d like to add any color or details to the face of your polar bear, do that now. Glue the polar bear ears to the top of the paper plate. Use the glue stick to fill in a large section of the polar bear head. Web i mainly use this polar bear craft with preschool kids.
They Will Then Glue The Letter Snowballs Onto The Polar Bear.
Fold the strip round and stick the two ends together to form a tube. Do not republish, upload, or alter the pdf files. Begin by gluing the nose and mouth to the middle of the paper plate, near the bottom. You can laminate the craft and hide the pieces in a sensory bin for toddlers.
Download The Polar Bear Template, Print, And Cut Out The Pieces.
Add the legs and tail. Place the polar bear head template in the middle of the paper plate, trace with the pencil, and cut it out. Polar bear activities are really popular for people looking at arctic animals during the winter season but you can also use them as part of looking at the environment or a wider topic on animals. Use puffy paint to make your own polar bear soft.
Add Glue To The Entire Surface Of The Paper Plate.
Pair it with our penguin template to create a few different arctic animals. Begin by gluing the side pieces to all but one side of the tissue box. You can then add the letters of their name onto the snowballs. Cut this strip in half.