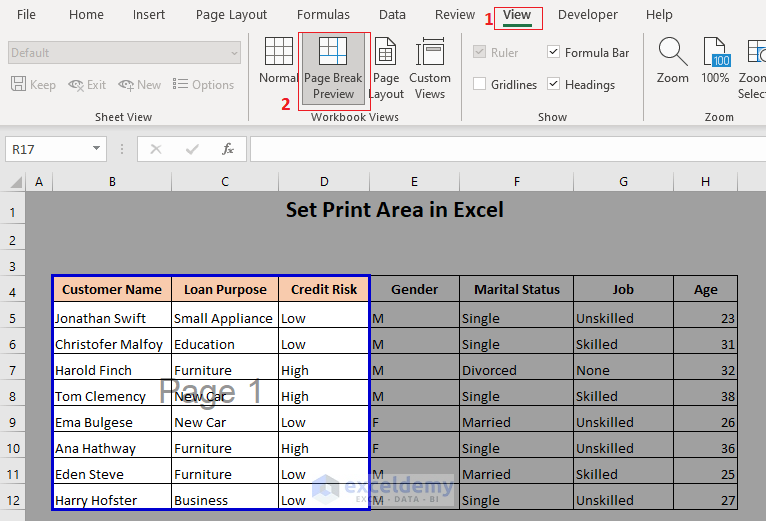
Select Printable Area Excel - Save, close and reopen the excel file. Finally, click “ print ” to print the designated area. The spreadsheet will be shown in page break view. Web select the cells you want to set as the print area. We can testify it from the print preview option. We can show the selected print areas in excel with the help of the file tab option. Web to set a print area, execute the following steps. See the print preview below. Next, click page layout > print area > set print area. Here we have the steps:

Select Printable Area Excel
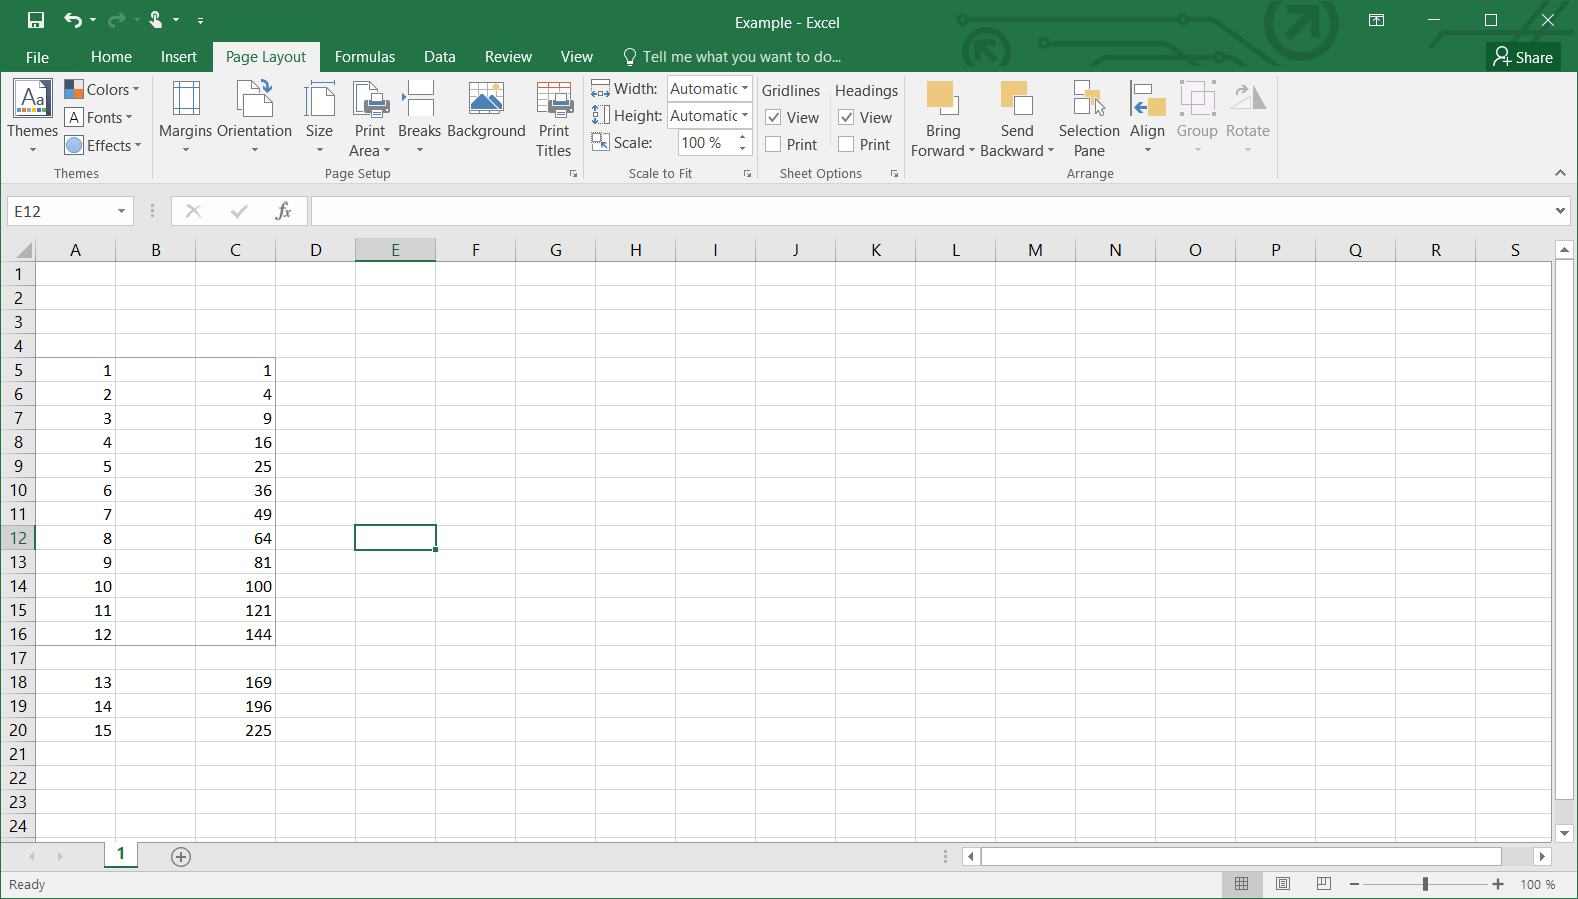
It also creates a named range for the selected area (the name print_area would be visible in the name box). Now when you print this.
Select Printable Area Excel
Here we have selected b4:f12. First, select the whole data table. Row with incl + row with excl on page 3. If you print the.

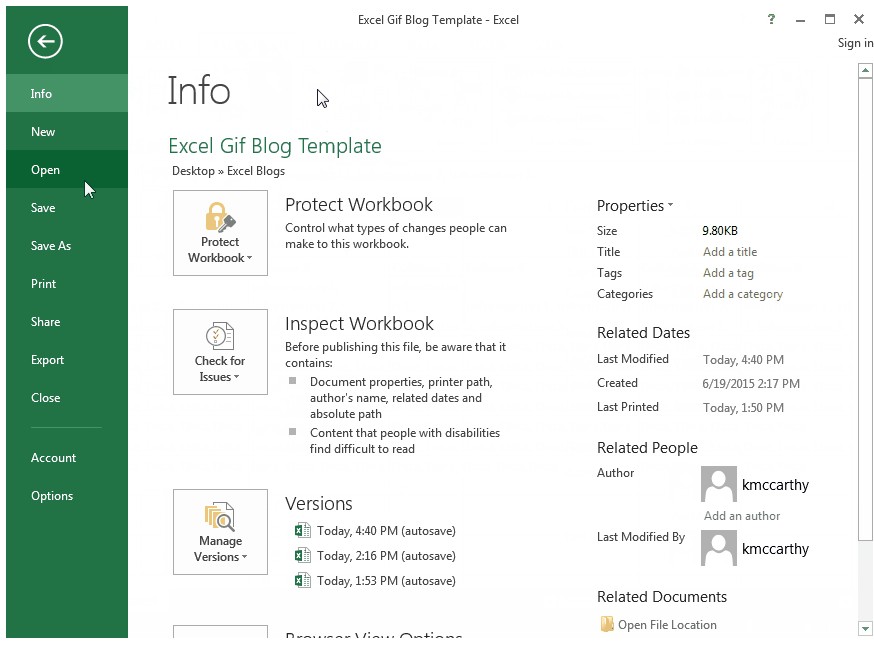
How to Clear a Print Area in Excel for Office 365 Support Your Tech
Save, close and reopen the excel file. Highlight the area you want to set as the printable area. To check the print area, click “.
How To Select Printable Area In Excel
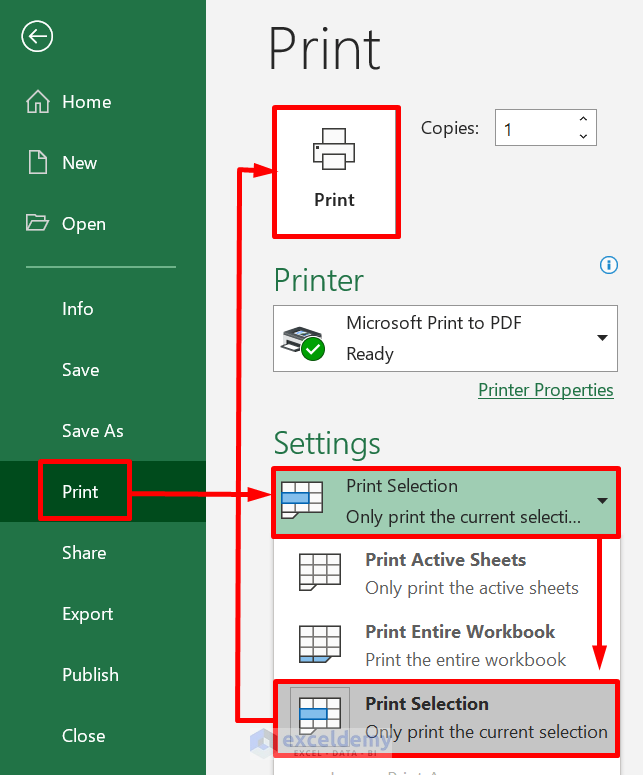
Afterward, go to the print active sheets option and choose the print selection option. Web to set the print area, you select the area and.
:max_bytes(150000):strip_icc()/ExcelSetPrintArea-5c23d199c9e77c0001adc722.jpg)
How To Select Printable Area In Excel
Highlight a cell range you want to print exclusively on the paper sheet. Add cells to an existing print area. To check the print area,.
How to Print Selected Area in Excel on One Page (3 Methods)
The spreadsheet will be shown in page break view. We can show the selected print areas in excel with the help of the file tab.
How to Set Print Area in Excel (5 Methods) ExcelDemy
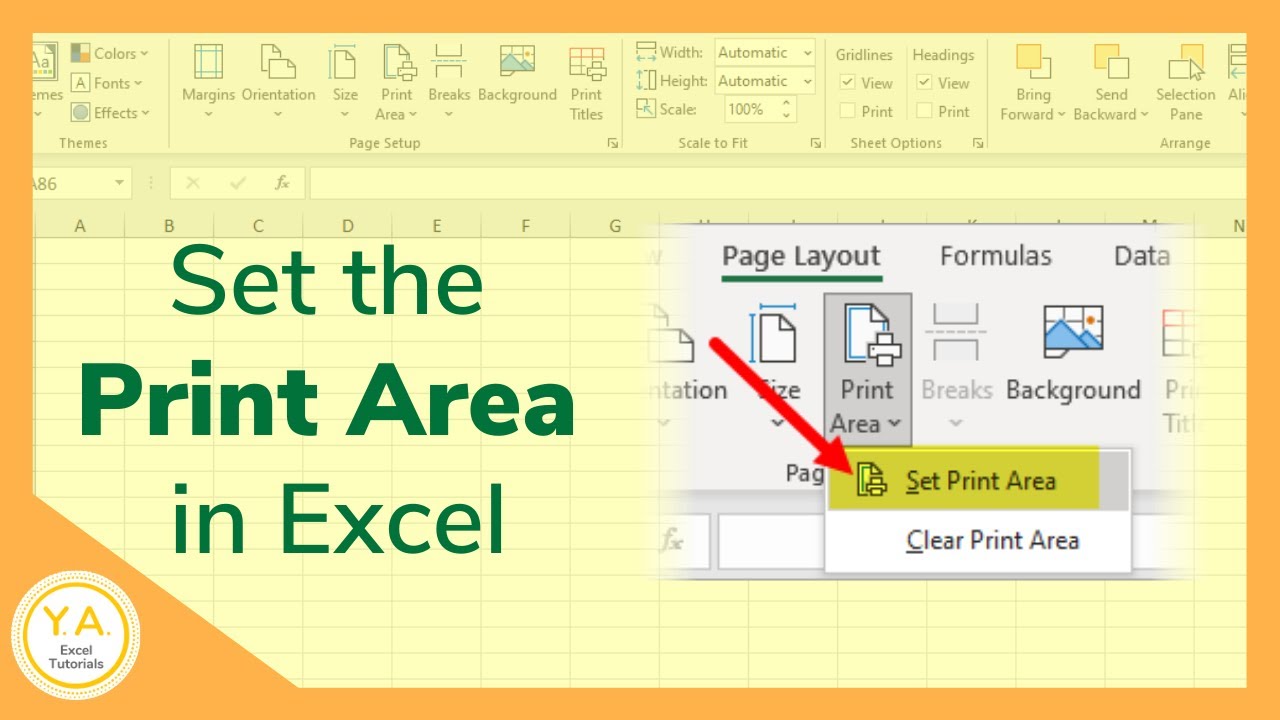
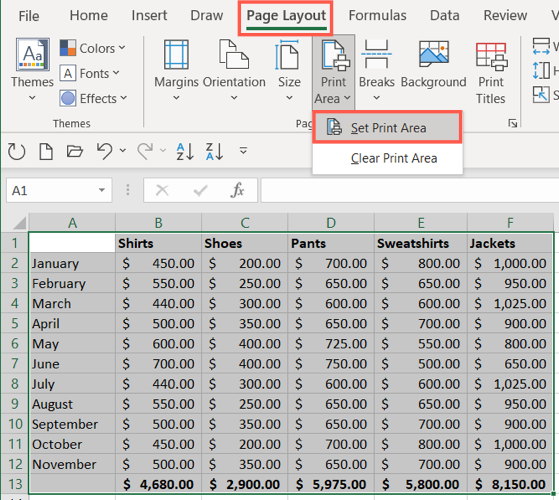
Next, click page layout > print area > set print area. This option will save you from needing to select the range each time you.
Setting a Print Area in Excel Learn Excel Now
In the print dropdown, click on the “set print area”. Web learn how to select print area in excel manually or by using macros for.
How to Set the Print Area in Microsoft Excel
It will print only the current selection of the page. Here we have the steps: Highlight the cells you want to print by clicking on.
How To Select Printable Area In Excel
Next, click page layout > print area > set print area. Select the area that you need to print. Now, click on the first option.
Select The Cell Range To Print.
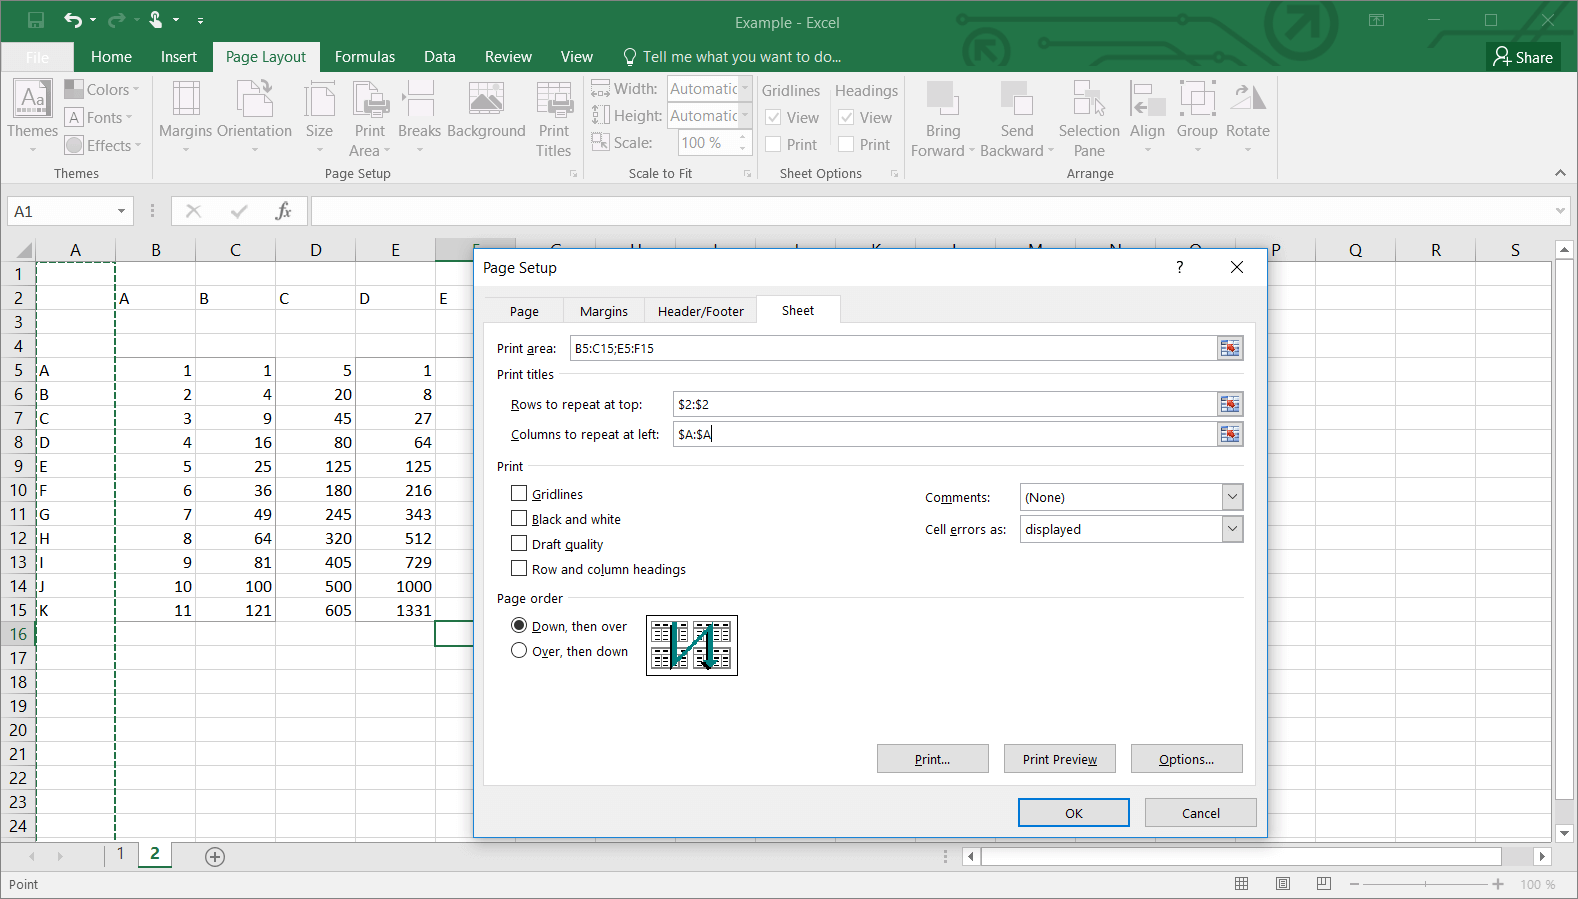
First, select the whole data table. We can testify it from the print preview option. On the page layout tab, in the page setup group, click print area. Web to set a single print area, select the cells.
Next, Select The Print Option.
Select a range of cells. The cells that are set as the print area are marked as page 1. Then, go to the file tab option. Select the area or cells on the worksheet that are to be printed.
Set One Or More Print Areas.
However, setting the click print area in excel will only allow you to include the selected area instead of the entire workbook. Here we have the steps: Set one or more print areas. Go to the page layout tab.
To Set Multiple Print Areas, Hold Down The Ctrl.
On the file tab, click print. Lastly, click on the print button. Web today we’ll be talking about how to set the print area in excel. Choose set print area. to set multiple print areas in your sheet, hold ctrl as you select each group of cells.